How to Iron on Patches: A Step-by-Step Guide for Perfect Application

Personalizing clothing and accessories with iron-on patches offers a creative and cost-effective way to express individuality or repair damaged items. However, achieving a perfect, long-lasting result requires precision. This guide provides a clear step-by-step process, covering patch types, fabric compatibility and troubleshooting common problems, empowering you to create professional-looking results. Let’s read!
1. Preparing for Patch Application
1.1 Choosing the Right Patch and Garment
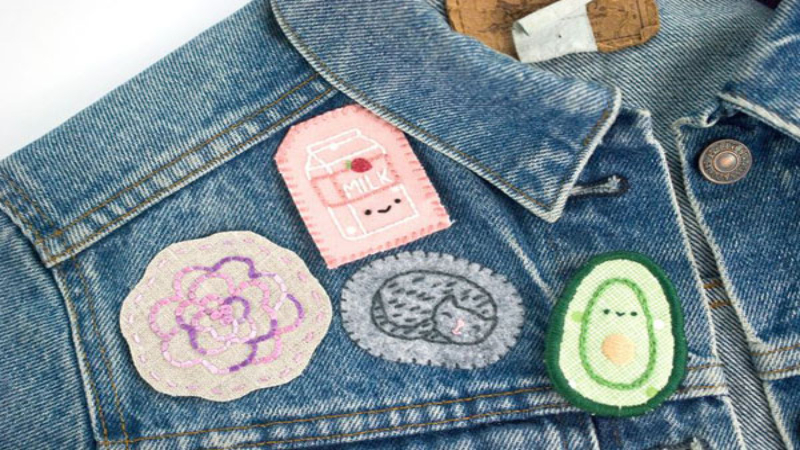
To ensure a patch application process that yields the best results, the initial and most important step is carefully considering the selection of both the patch and the garment it will be applied to. There’s a diverse range of iron-on patches available, each with unique characteristics.
You’ll find embroidered patches, known for their textured and detailed designs; woven patches, offering a smoother, more integrated look; printed patches, which are excellent for complex graphics and photographic images; PVC patches, which are durable and waterproof; and leather patches, providing a premium, rugged aesthetic. It’s important to recognize that each of these patch types reacts differently to heat and possesses varying levels of adhesive strength.
Before proceeding with any patch application, a crucial step is to always examine the care label of the garment. This will provide essential information about the fabric composition and its heat tolerance. Fabrics like denim, canvas, and cotton are generally excellent choices for iron-on patches due to their ability to withstand heat and provide a good surface for adhesion. However, it’s equally important to be cautious with more delicate fabrics…
1.2 Gathering Your Supplies
To ensure a smooth and effective iron-on patch application, having all the necessary tools and materials prepared beforehand is key. Think of it like setting up your workspace before starting any crafting project – it just makes the whole process easier and more efficient. Here’s a list of what you’ll need to gather:
First, you’ll definitely need an iron, the heat source for activating the patch’s adhesive. An ironing board provides a stable and heat-resistant surface to work on. Crucially, a press cloth, or a thin piece of cotton fabric, is essential.
This acts as a protective barrier between the direct heat of the iron and both the patch and the garment, preventing scorching or unwanted shine, especially on more delicate fabrics. A towel folded to create a firm surface can be placed underneath the garment area where the patch will be applied.
This helps to ensure even pressure and heat distribution. Parchment paper is another useful item; placing it between the patch and the iron, or even between the patch and the garment, can further protect delicate materials and prevent any potential sticking. For precise placement, a measuring tape and scissors can be very helpful, especially if you need to trim the patch or ensure it’s positioned exactly where you want it.
If you are dealing with applying patches in larger quantities, perhaps for a batch of uniforms or merchandise, a heat press can be a worthwhile investment. Heat presses are designed to provide consistent and even heat and pressure across the entire patch area, significantly speeding up the application process and ensuring a more uniform result, especially when working on a larger scale.
Finally, it’s worth noting that certain types of patches with unique characteristics, such as reflective or glow-in-the-dark patches, might require slightly different application techniques or considerations. These specialized patches may have specific heat sensitivity or adhesive requirements, so it’s always a good idea to check the manufacturer’s instructions for the best method to apply them.
2. Step-by-Step Iron-on Patch Application
2.1 Preparing the Garment and Patch
Before you actually start ironing, taking a few moments to properly prepare both the garment and the patch is a really worthwhile step that makes a big difference in the final result. Think of it as creating the perfect foundation for a strong and lasting bond.
First things first, make sure the area of the garment where you plan to apply the patch is clean. Give it a quick once-over to remove any loose threads, dust, or lint. A lint roller can be really handy for this, especially on fabrics that tend to attract fluff. Similarly, check the back of the patch itself and gently remove any loose fibers or debris. Having both surfaces clean and free of any particles ensures that the adhesive on the patch can make direct and full contact with the fabric of the garment.
Another tip that professionals often use is to preheat the area on the garment where the patch will go. You can do this by simply running your iron over that spot for about 10-20 seconds before positioning the patch. This preheating step warms up the fabric fibers, which helps to improve the initial bond of the adhesive when you apply the hot iron with the patch in place. It’s a bit like priming a surface before painting – it just helps everything stick together better and more securely.
One of the great things about iron-on patches is their user-friendliness and the amazing variety of designs available. They offer a really accessible way to personalize clothing, bags, and all sorts of fabric items. However, even with such an easy application method, taking this initial step of preparing the garment and patch is crucial. It’s a small detail, but it’s what elevates the application from just ‘stuck on’ to a professional-looking, durable finish that you’ll be happy with.
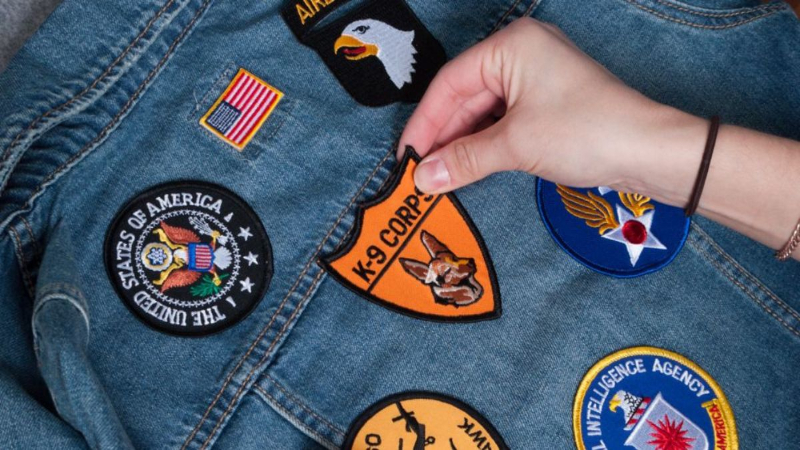
2.2 Positioning and Securing the Patch
Precise patch placement is crucial. Use a measuring tape to accurately center the patch before ironing. Pins can temporarily secure the patch, preventing shifting during the heat application process. Consider design aspects and ensure the placement aligns with your creative vision, whether for customization or repair.
2.3 Applying Heat and Pressure
Use a dry iron set to medium heat. Place a press cloth over the patch to prevent scorching. Apply firm, even pressure for 20-30 seconds, depending on fabric type. Avoid moving the iron; stationary ironing ensures even heat distribution. Different fabrics may need slightly adjusted temperatures.

2.4 Securing the Patch from the Back
Turn the garment inside out and iron the back of the patch for about 30 seconds. This reinforces adhesion and ensures a long-lasting bond. This crucial step enhances the durability of the patch and prevents premature peeling.
3. Tips for Best Results and Troubleshooting
3.1 Cooling and Checking Adhesion
Allow the patch to cool completely after ironing before handling. Check the edges for proper adhesion; gently lift an edge to test. If any area is loose, carefully re-iron that section using a press cloth.
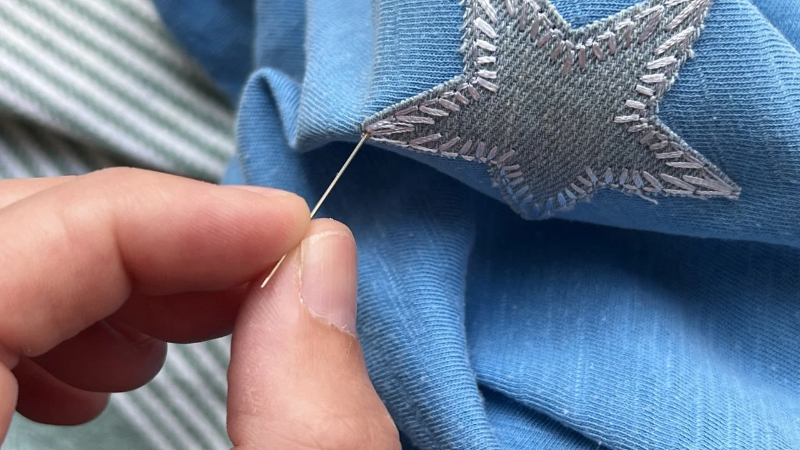
3.2 Sewing for Extra Durability (Optional)
For added security on frequently washed items or patches prone to peeling, sew around the patch’s edges using a needle and thread. This creates a permanent attachment, especially beneficial for embroidered patches or woven patches. This simple step greatly enhances patch longevity.
3.3 Troubleshooting Common Problems
Patch peeling often results from insufficient heat or pressure; bubbling signifies trapped air or uneven heat distribution. Scorching is caused by excessive heat or lack of a press cloth. Adhesive residue can be carefully removed with a damp cloth. Using the correct temperature is vital in preventing these problems.
4. FAQs about Iron-On Patches
4.1 What if I don’t have an iron? Can I use a hair straightener?
While a hair straightener can provide heat, it’s less ideal than an iron due to its smaller surface area and potential for uneven heat distribution. Exercise caution; use a press cloth to protect the garment and avoid extremely high heat settings. Always prioritize safety when using heat application tools.
4.2 What types of fabrics are NOT suitable for iron-on patches?
Delicate fabrics like silk, leather, suede and some stretch fabrics are not suitable for iron-on patches due to their heat sensitivity. These materials can be easily damaged by the heat of the iron. Alternative attachment methods should be considered for these fabrics.
4.3 How do I remove an iron-on patch that I no longer want?
Carefully peel the patch from the garment. If it’s resistant, gently apply heat with an iron to loosen the adhesive. If adhesive residue remains, try rubbing alcohol or a commercial adhesive remover. Always test any cleaning solution on an inconspicuous area first.
4.4 Can I wash my garment with an iron-on patch?
Generally, yes, but wait 24 hours after application before washing. Turn the garment inside out and use a gentle cycle and cool water. For extra durability, consider sewing around the patch’s edges, especially for frequently washed items. Always follow the care instructions for both the patch and garment.
4.5 My patch is peeling after washing. What can I do?
Patch peeling after washing often indicates insufficient heat or pressure during application. Try carefully re-ironing the patch with a press cloth, ensuring even pressure and adequate heat. If the peeling persists, sew around the patch for a more permanent solution.
5. Packlove – Providing Custom Packaging Solutions for Your Patch Projects
Packlove offers a range of custom packaging solutions ideal for protecting and presenting your patch projects. From durable zipper bags for storage to secure poly mailers for shipping and custom printed labels for branding, we cater to both individual crafters and businesses involved in the DIY fashion or custom patches market. Our packaging ensures your creations arrive safely and look professional. Contact us at +84 363615867 or infopacklove@gmail.com or visit our website at https://Packlove.com/ to explore our options.
Read More:
- How to Sew a Patch on a Hat: A Step-by-Step Guide
- Gluing on Patches: Your Ultimate Guide to Perfect Application
- How to Sew a Patch on a Hat: A Step-by-Step Guide
Successfully applying iron-on patches involves selecting compatible patches and fabrics, applying consistent heat and pressure and knowing how to troubleshoot common issues. Well-applied patches offer a fantastic way to personalize clothing, express your creativity and even repair damaged items. Don’t be afraid to experiment; the possibilities are endless! Visit Packlove for custom packaging solutions to showcase your unique creations!


