How to Make Embroidered Patches: A Step-by-Step DIY Guide

Tired of generic patches? Frustrated by the high cost of custom designs? This guide empowers you to create unique, personalized embroidered patches, transforming ordinary items into expressive works of art. Whether you’re a seasoned crafter or a DIY novice, learn to design and stitch your own custom patches, perfectly reflecting your style and personality. Let’s see!
1. Designing Your Embroidered Patch
1.1 Choosing Your Design and Materials
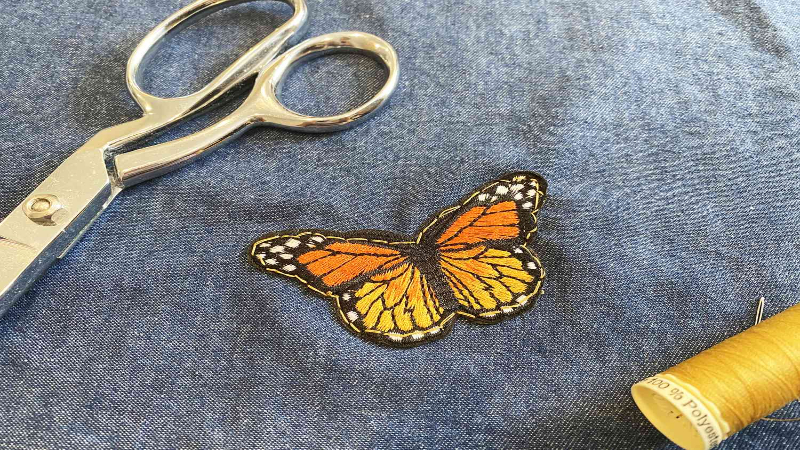
The journey of creating a unique embroidered patch begins with design. You have a wide range of creative avenues to explore to find the perfect look. For those seeking inspiration, online templates can be a fantastic starting point, offering a variety of styles and themes.
Alternatively, if you have a specific vision, crafting your own custom drawings allows for complete creative control. For designs that require precision and intricate details, design software provides powerful tools to bring complex ideas to life. Ultimately, the design direction is entirely in your hands, allowing for true personalization.
Once the design concept is in place, the next crucial step is selecting the right materials. The foundation of any durable embroidered patch is the backing fabric. Options like twill, cotton, or felt are excellent choices, known for their robustness and ability to provide solid support for the embroidery.
Beyond the backing, the stabilizer plays a vital role in the embroidery process itself. A stabilizer ensures even stitching and prevents the fabric from puckering or distorting during embroidery. Depending on the complexity of your design and the type of fabric you’re using, you can choose from different types of stabilizers such as cut-away, tear-away, or wash-away. Each type offers unique benefits for different embroidery needs.

1.2 Preparing the Fabric and Hoop
Accurately transferring your chosen embroidery designs onto your selected fabric is key. Use a fabric pen to carefully trace your design. Proper hooping is essential for maintaining consistent tension during stitching. Use a suitable embroidery hoop and follow proper hooping techniques to avoid fabric wrinkles.
2. Embroidering the Patch
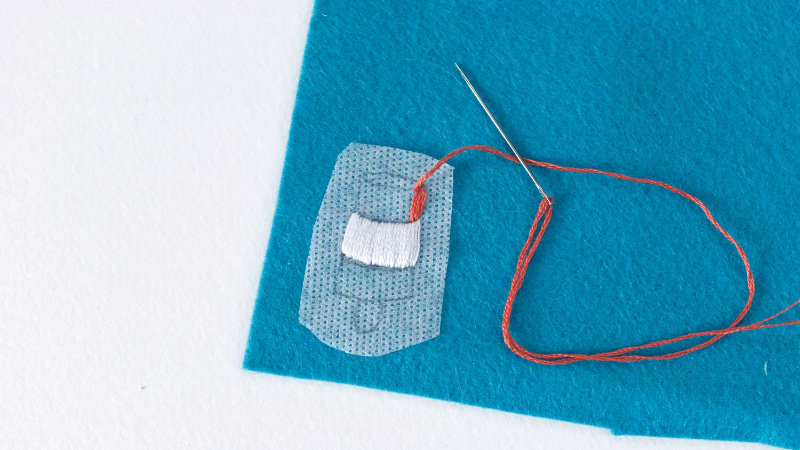
2.1 Hand Embroidery Techniques
Create your hand-embroidered patches using basic stitches. The backstitch offers clean lines, ideal for outlines and lettering. The satin stitch fills areas with a smooth, solid color. The versatile stem stitch creates textured lines and stems perfect for adding details. Use high-quality embroidery floss and a needle appropriate for your fabric.
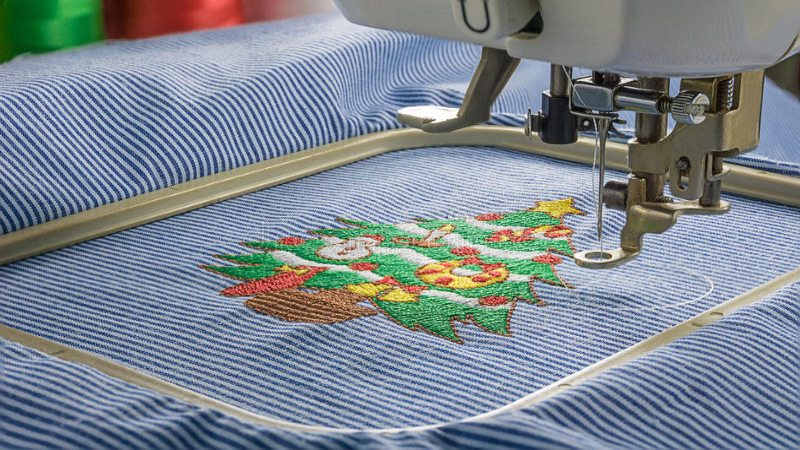
2.2 Machine Embroidery Techniques
For more complex designs or large-scale production, a machine embroidery process provides efficiency. This involves digitizing your design into an embroidery file, a digital file readable by your embroidery machine. Select appropriate settings such as stitch density and fabric type to ensure high-quality results.
Use specialized crafting tools for accurate placement and a professional finish. Machine-embroidered patches are particularly suitable for creating consistent and high-volume designs.
3. Finishing and Applying Your Patch
3.1 Finishing the Edges
Neatly finished edges enhance the durability and the overall appearance of your patch. Several methods prevent fraying. A heat seal backing offers a quick and clean finish. The whip stitch and blanket stitch are classic hand-sewing techniques that provide a decorative and secure edge.
For a professional look, consider using a merrow border, a specialized machine-finished edge. Choose the method best suited to your skill level and desired aesthetic. Clean, well-finished edges contribute to the longevity and quality of your embroidered patch.
3.2 Attaching the Patch (Iron-On, Sew-On, Adhesive)
Attaching your patch is the final step. Iron-on patches are quick and easy for many fabrics. Sew-on patches provide superior durability, especially for items frequently washed. Adhesive backing offers a simple solution but is less durable. Pinbacks are ideal for removable patches. Fabric glue provides flexibility but requires precise application. For personalized gifts or custom apparel, select the attachment method that best suits your project’s needs and desired permanence.
Iron-on, sew-on and adhesive options offer versatile solutions depending on your preference. Consider the fabric type and intended use when choosing your preferred application method.
4. Different Types of Embroidered Patches
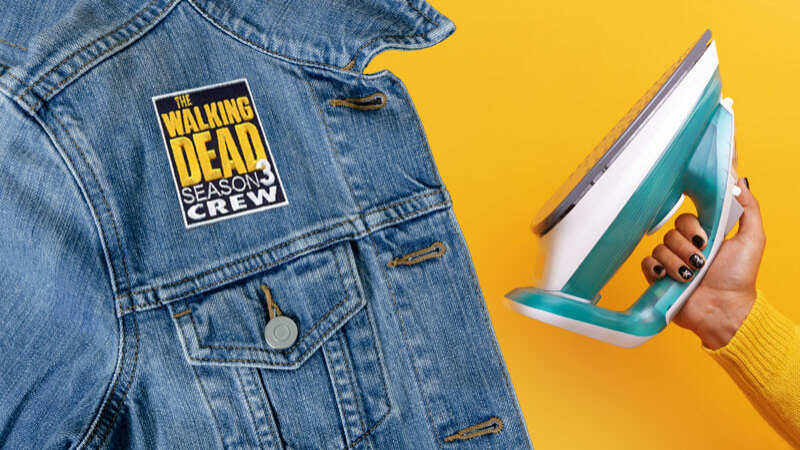
4.1 Iron-On Patches
Iron-on patches offer a convenient application method. Creating iron-on patches involves applying a fusible web to the back of your embroidered fabric. This adhesive backing allows for easy attachment using an iron, providing a simple and effective way to personalize clothing and accessories. For strong adhesion, ensure proper iron temperature and pressure and follow the manufacturer’s instructions on the fusible web.
Iron-on patches are a simple and fast way to add your designs to different items. They are ideal for a variety of fabrics and provide a secure bond when applied correctly. The application method is easy to understand and requires minimal equipment. Always test the iron-on process on a scrap fabric first to avoid damage to your finished piece. Proper preparation of both the patch and the application surface is key.
4.2 Sew-On Patches
Sew-on patches offer exceptional durability and longevity. Choose appropriate sewing supplies including needles and thread that suit both your patch and the fabric to which you’re applying it. Various sewing techniques from simple running stitches to more decorative approaches can be employed. Select thread colors that complement or contrast with your design for visual impact.
Sew-on patches are highly durable and suitable for items that need to withstand frequent washing or use. They offer a more secure and long-lasting attachment than iron-on or adhesive methods. Sewing allows for a more creative and customized look. The correct needle and thread selection impacts the final result. A stronger thread is needed for heavy-duty applications and thicker materials.
4.3 Adhesive Patches
Adhesive patches offer a quick and easy attachment without sewing or ironing. Employing high-quality fabric glue or a strong permanent adhesive will ensure your patch stays securely in place. This method is best suited for applications that don’t require extreme durability or repeated washing. Carefully choose an adhesive that’s compatible with both your patch and the application surface.
Adhesive patches provide a convenient alternative, however, their longevity is less than other methods. The type of adhesive selected significantly impacts the attachment strength. The surface preparation is crucial for effective bonding. Use a small amount of adhesive to avoid mess and ensure it is evenly distributed. Avoid applying excessive force immediately after adhering.
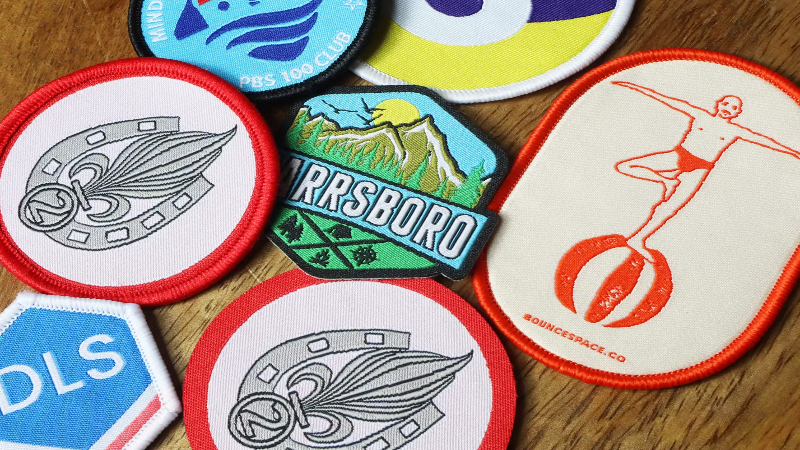
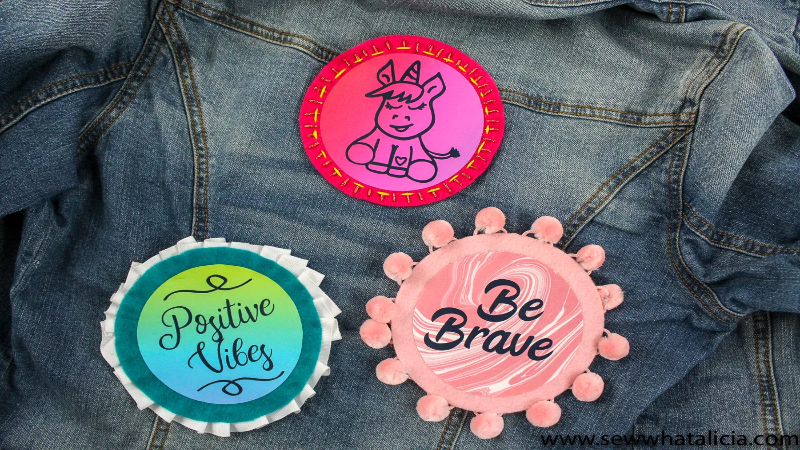
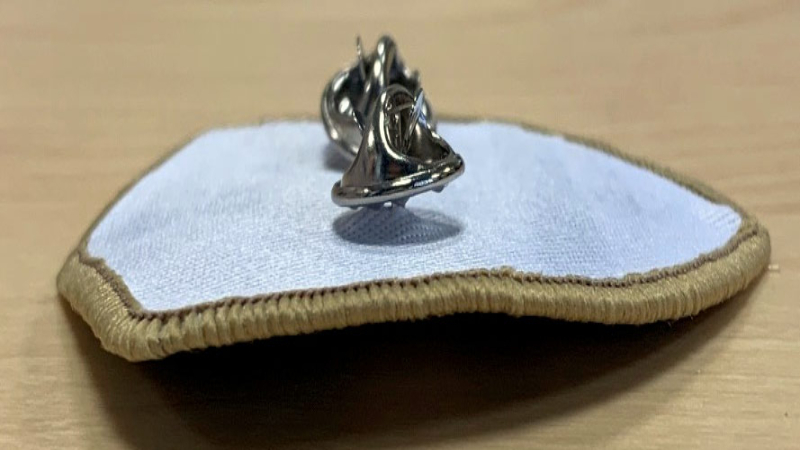
4.4 Removable Pin Patches
Removable pin patches offer versatility and style. Attaching pin backs to your completed patches allows for easy attachment and removal from garments. This feature allows for easy style changes and is especially convenient for fashion accessories or temporary applications.
Choose high-quality pinbacks to ensure secure attachment and prevent damage to the patch. They are very convenient when needing to repeatedly reposition the patch or remove it easily from the garment. This allows for more flexibility and freedom in style choices.
5. FAQs about Embroidered Patches
5.1 What fabric is best for embroidered patches?
Twill, cotton and felt each offer unique properties for embroidered patches. Twill provides durability and a professional finish but can be more challenging for beginners. Cotton offers a softer feel and breathability but is prone to fraying. Felt is easy to work with and doesn’t fray but may lack the durability of twill or cotton. The best choice depends on your skill level, desired durability and intended use.
5.2 How do I prevent fraying?
Preventing fraying is essential for creating durable embroidered patches. Several methods are available including using a heat seal backing which provides a clean, quick finish. Hand-sewing techniques like the whip stitch and blanket stitch secure the edges while a merrow border, a machine-finished edge, creates a professional look. Selecting a non-fraying fabric like felt also helps minimize fraying concerns.
5.3 Can I wash clothes with an embroidered patch?
Washability depends on the patch type and application method. Iron-on patches generally hold up well to washing but it’s advisable to turn the garment inside out and use a gentle cycle to extend their life. Sew-on patches are the most durable and can withstand repeated washing. Adhesive patches are the least durable and should be hand-washed or spot-cleaned only. For removable pin patches, remove prior to washing. Always check the care instructions for your specific materials. Using a mesh laundry bag can offer extra protection for your embellished garments.
5.4 Difference between hand & machine embroidery for patches?
Hand embroidery and machine embroidery offer different advantages. Hand embroidery offers a more personal touch, perfect for smaller, intricate designs; however, it is time-consuming. Machine embroidery is much faster and ideal for larger, more complex designs or mass production, although it requires specialized equipment and software. The cost is higher initially with machine embroidery but the cost per patch is lower for larger quantities.
5.5 Where can I find free embroidery designs?
Numerous online resources offer free embroidery designs. Many websites and design communities provide downloadable patterns. Some design software offers free trials or free basic versions to help you create your own designs. Explore various online platforms and communities for inspiration.
6. Packlove – Providing Services for Custom Embroidered Patches
Packlove offers comprehensive services for creating custom embroidered patches. Our expertise extends across design, material selection and production, ensuring high-quality results for both individuals and businesses. With years of experience, we provide a wide range of options from design assistance to bulk order fulfillment. We handle everything from concept to completion. Contact our team today to discuss your project.
We are committed to providing exceptional customer service and high-quality products. Our team of experts is dedicated to helping customers bring their patch ideas to life. We work closely with customers throughout the design and production process to ensure customer satisfaction. Get a quote today and let us help you create the perfect custom embroidered patches perfectly reflecting your brand or personal style. Visit our website or call us at +84 363615867 to get started.
Read More:
- How to Sew a Patch on a Hat: A Step-by-Step Guide
- How to Attach Patches to a Jacket: Iron-On, Sew-On & More
- How to Make Patches: DIY Embroidered & Iron-On Patch Guide
This guide has equipped you with the knowledge to design and create your own unique embroidered patches. From choosing the right fabric and mastering embroidery techniques to selecting appropriate finishing and application methods, you now possess the skills to transform your creative visions into reality. Visit Packlove.com to explore our range of high-quality supplies and services!


