How to Put on a Patch Without an Iron: Easy No-Sew Methods

Applying patches to clothing and accessories doesn’t always require an iron or advanced sewing skills. If you’re concerned about damaging delicate materials with heat or simply looking for a quicker, easier method, you’re in the right place. This article will guide you through various effective techniques for applying patches without using heat. Whether you’re a DIY enthusiast wanting to add a personal touch to your items, a student needing a fast repair, or someone who wants to protect sensitive fabrics, these no-heat methods offer practical solutions for everyday patching needs. We’ll explore different approaches, helping you choose the best one based on your fabric type and how long you want the patch to stay in place.
1. Applying patches without an iron: No-heat methods
1.1 Using fabric glue for a strong bond
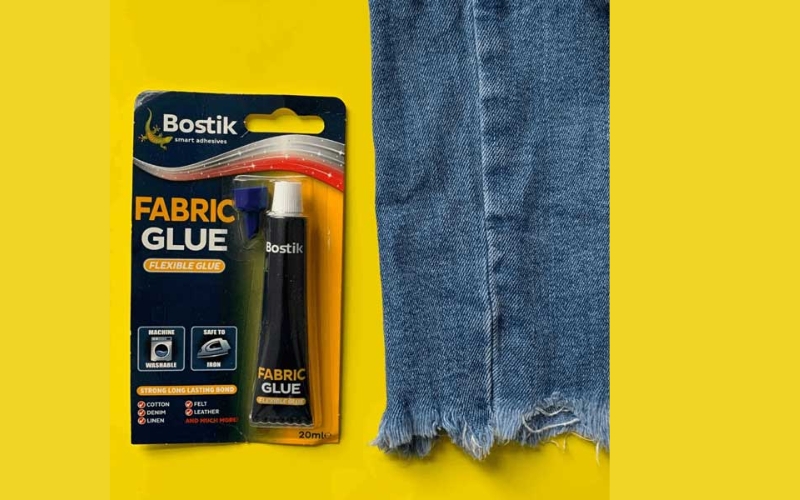
Fabric glue offers a simple, no-iron solution for attaching patches to a wide array of fabrics. The key is selecting the right glue for the job. For instance, a heavy-duty fabric glue might be best suited for denim or canvas, while a flexible glue is ideal for stretchy fabrics like jersey or knitwear. Choosing the appropriate glue type ensures a secure and lasting bond without causing damage or uneven adhesion.
Before starting, thoroughly clean the area where the patch will be placed to remove any dirt or debris. This will create a clean surface for the glue to adhere properly. Always apply the glue to the patch, not directly to the garment. This method prevents excess glue from being absorbed into the garment, which can lead to a messy, uneven application.
Next, carefully position the patch over the area you want to repair or decorate. Press firmly but gently to ensure good contact between the patch and the fabric. Avoid applying excessive pressure, as it can distort the patch or cause it to wrinkle. For a neat, clean finish, use a soft cloth or a dry, lint-free sponge to smooth out any air bubbles or wrinkles.
Specific glue brands such as E6000 Fabric Adhesive or Aleene’s Tacky Glue are popular choices, but research different options depending on your specific fabric type. Allow the glue to dry completely, following the manufacturer’s drying time recommendations. This usually takes several hours, potentially overnight. Over-application is common, so ensure you don’t add excess glue to the patch. If any glue spills or drips, wipe them up immediately with a damp cloth or paper towel before the glue hardens.
1.2 Quick fixes with adhesive spray and peel-and-stick patches
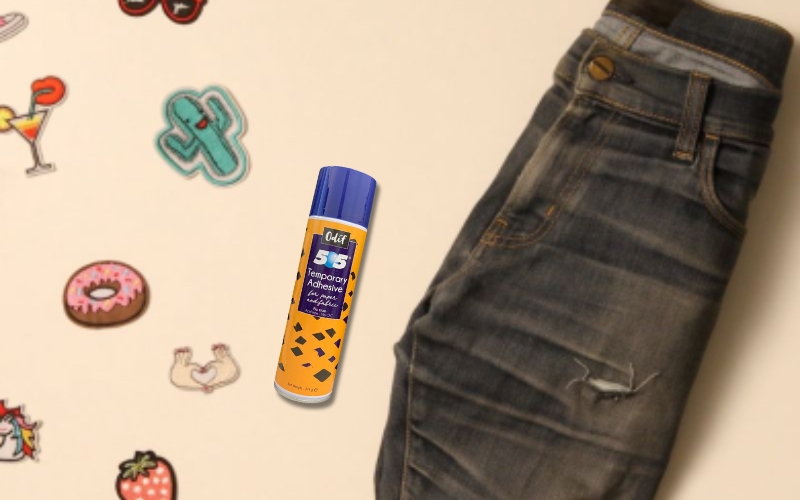
When speed and simplicity are paramount, adhesive spray and peel-and-stick patches offer exceptionally convenient solutions. For those seeking a truly effortless approach to patch application, adhesive spray is a highly recommended method.
The process is remarkably straightforward and satisfyingly quick. It’s an almost intuitive way to attach patches securely. A key tip when using spray adhesive is to opt for a repositionable variety. This feature is invaluable as it allows for adjustments to the patch’s placement if needed, ensuring accurate positioning before the adhesive fully sets.
Adhesive spray stands out as an excellent heat-free alternative readily available in most craft stores and online retailers. The spray application method is not only simple but also quite economical. Applying adhesive spray is remarkably easy for both fabric patches and garments.
The technique involves spraying the adhesive evenly onto the back of the patch. It’s advisable to allow a brief drying period after spraying before firmly pressing the patch onto the chosen garment or item. This short wait time helps the adhesive become slightly tackier, leading to a stronger bond.
1.3 Securely attaching patches with velcro
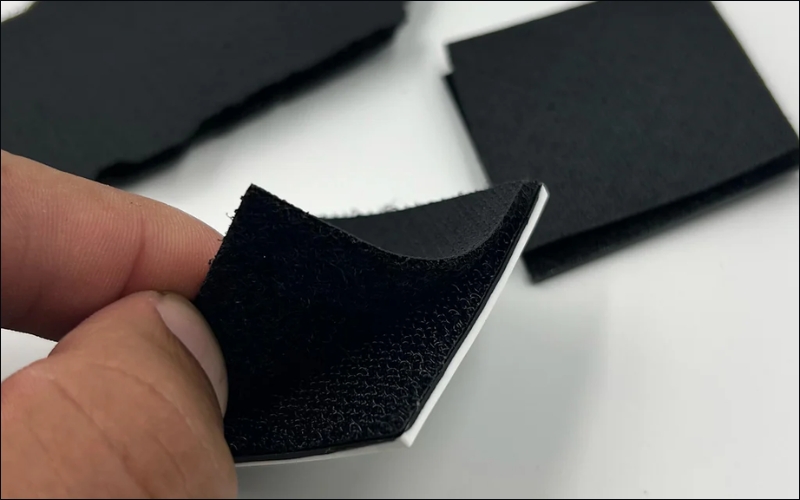
For a truly simple and budget-friendly solution to patch application, consider velcro patches. These are widely accessible, very affordable, and incredibly user-friendly, requiring no specialized skills whatsoever. Velcro patches are excellent for fast repairs or adding a unique, personal touch to your clothes.
This adaptable option works seamlessly on various garments, whether you choose to sew them on later for extra security or not. Typically, these patches come with a self-adhesive backing, making application a breeze. Simply position the patch where you want it and apply a bit of pressure to ensure it firmly sticks to the fabric.
2. Alternative heat sources for patch application
2.1 Using a hair straightener for small patches
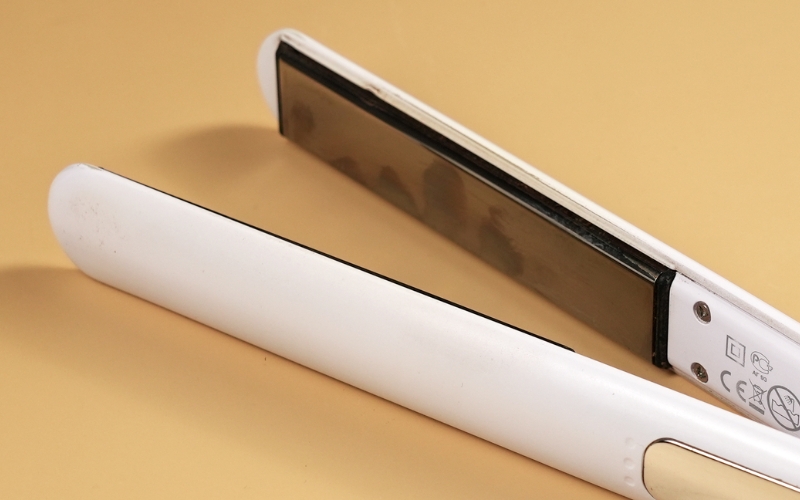
While an iron is the standard for applying iron-on patches, a hair straightener can be an effective alternative. Its flat, heated plates offer a consistent heat source, ideal for even patch application without an iron.
To use this method, begin by cleaning the fabric surface where you’ll place the patch. Position the patch adhesive-side down. For added protection and even heat distribution, place a thin cloth or parchment paper over the patch.
Set your hair straightener to a low-to-medium heat setting and carefully glide it over the patch, ensuring even coverage for approximately 15 seconds. Press firmly on the patch to ensure good adhesion. Let the fabric cool slightly, then test the patch’s adhesion.
This method allows for precise control, particularly helpful with smaller or intricate patches. Experiment with different heat settings to determine the optimal temperature for your specific fabric and patch type.
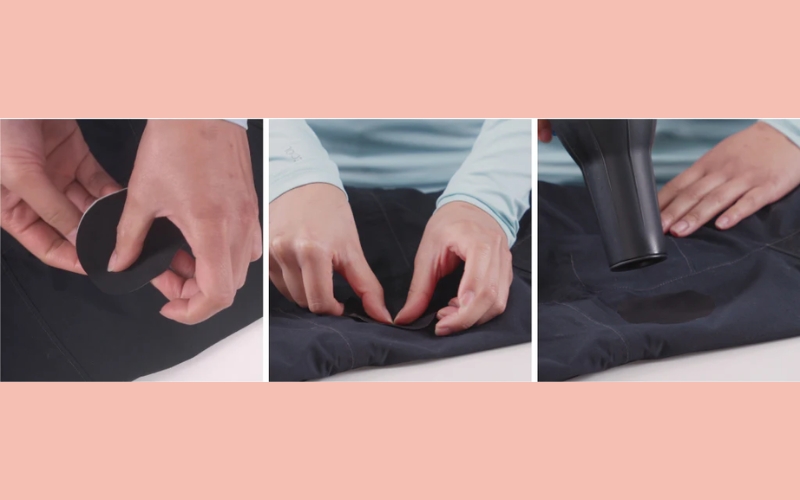
2.2 Applying patches with a hair dryer
If you don’t have an iron, a hair dryer can be a simple alternative for applying patches to your clothes.
- First, place the patch in your desired position on the fabric.
- Set your hair dryer to the highest heat setting and hold it a few inches away from the patch.
- Direct the hot air evenly over the patch for about 3–5 minutes, allowing the adhesive to soften and bond with the fabric.
- Press down firmly with your hand or a flat object to secure the patch in place. For extra durability, you can repeat the process or stitch around the edges after heating.
3. Choosing the right patch application method
3.1 Matching the method to your fabric
Choosing the right patch application method depends heavily on the fabric type. Different fabrics react differently to various adhesives and techniques, affecting both the durability and washability of the repair. Consider the material of the patch itself as well. A delicate patch might not hold up to the same level of pressure or heat as a heavier-duty patch.
For cotton fabrics, the traditional iron-on method often works well, providing a strong and washable bond. The same holds true for polyester. The gentle heat and pressure typically won’t damage these materials. Iron-on patches also adhere well to lightweight knits and even some blends.
Denim, known for its durability, often benefits from fabric glue or heavy-duty iron-on adhesives. These methods offer a permanent bond that can withstand the wear and tear of this robust material. Fabric glue, in particular, excels in this application, especially when a strong and lasting repair is necessary, like mending a denim jacket.
Leather, with its unique structure, may require a specialized adhesive or a precise application of a strong fabric glue to avoid compromising its texture or integrity. For temporary fixes on costumes or accessories, adhesive sprays can be effective.
Nylon and similar synthetic materials can be tricky to work with. They might not respond well to direct heat or intense pressure. Therefore, adhesive spray for temporary fixes or fabric glue for more permanent repairs might be better options, while ensuring the glue or spray is compatible with the specific nylon type. Experimenting with a small, inconspicuous area before applying a larger patch is crucial in these cases.
Ultimately, understanding the properties of both the fabric and the patch material is key to selecting the appropriate method for achieving a durable and aesthetically pleasing repair. Always test a small, inconspicuous area of the fabric first to determine the best approach.
3.2 Considering permanence and patch design
When selecting a patch application method, the desired permanence is a crucial factor. A permanent fix might be ideal for everyday wear, while a temporary one might suffice for a special event or a costume. Consider the purpose of the patch when deciding if it needs to be durable through multiple washes and uses or only for a limited time.
Intricate patch designs with delicate embroidery or detailed patterns generally require a method that doesn’t risk distortion or damage. Glue, or even careful sewing, are often better options than iron-on methods for these types of patches, which could lose their detail if heat is applied incorrectly.
Similarly, the size and shape of the patch are key considerations. Large, bulky patches might be better suited to a technique like fabric glue, while smaller, intricate designs would benefit from precision-oriented applications like sewing or a strong fabric adhesive.
The patch material itself also impacts the best application method. Embroidered patches, for example, are best applied with a glue method that won’t damage the delicate threads or cause the embroidery to distort. Printed patches, however, might work well with adhesive sprays for a quicker, more temporary fix.
Likewise, the backing of the patch plays a role. A patch with a thin, delicate backing is susceptible to damage from heat, while one with a reinforced backing can often withstand a more robust application. By carefully considering these elements of patch design and permanence, you can ensure the most successful and aesthetically pleasing result.
4. Related questions
4.1 Can I wash clothes with patches attached using these methods?
The washability of your patched garment depends entirely on the method used. Always test a small, inconspicuous area of the fabric and patch first to determine how the fabric will react to the washing process.
Patches applied with fabric glue generally require a gentle cycle in a cold or lukewarm wash. Avoid harsh detergents or strong agitation, as this could potentially loosen the adhesive. Air drying is often preferred to prevent shrinking or further loosening.
Patches attached with an adhesive spray are often temporary, and the adhesive might be delicate enough to be removed with repeated washing. Air drying is usually the best approach for these types of patches, and avoid prolonged soaking or high-heat cycles.
Iron-on patches, when applied correctly, are often washable, though a delicate or cool cycle is recommended. Again, a test spot is crucial. Specific fabric care instructions printed on the patch or accompanying the fabric should also be followed. Always check the care instructions for both the fabric and the patch itself before washing.
4.2 What type of glue is best for patches on backpacks?
The best glue for backpack patches depends heavily on the backpack’s material. For nylon backpacks, a flexible adhesive is crucial to prevent cracking or tearing as the fabric stretches and flexes. This will allow the patch to move with the material of the backpack without jeopardizing the integrity of the repair. A strong, flexible adhesive will provide a secure, long-lasting bond without compromising the backpack’s flexibility.
Canvas backpacks, on the other hand, often benefit from a heavy-duty fabric glue. This type of glue provides the necessary strength and resilience to hold up under the typical wear and tear a canvas backpack experiences. The added durability is vital to endure the stresses of daily use. A glue that is specifically designed for canvas or similar tough fabrics will provide the most suitable and lasting repair.
Regardless of the material, it’s always a good practice to test the glue on a small, inconspicuous area of the backpack fabric first to ensure compatibility and proper adhesion before applying it to the patch.
4.3 How can I remove a patch applied without ironing?
For fabric glue, a specialized adhesive remover is often the most effective tool. Apply the remover to a cotton swab or cloth and gently dab at the patch. Let it sit for a few minutes to loosen the bond before carefully peeling away the patch. For delicate fabrics, this method is often the most gentle. If the patch is stubborn, you might need to apply the remover again and potentially repeat the process.
If you don’t have adhesive remover, rubbing alcohol can sometimes work effectively. Apply a small amount of rubbing alcohol to a cotton ball or soft cloth, and dab at the adhesive. Allow it to sit for a few minutes to loosen the bond. This method is suitable for various surfaces, but caution is needed with delicate fabrics as rubbing alcohol can sometimes damage the fibers.
Freezing the patch can also be a helpful tactic for loosening the adhesive bond. Place the item in a freezer bag and freeze it for at least 30 minutes, or longer if the patch remains stubborn. The cold temperature can weaken the adhesive, making it easier to remove the patch with minimal damage to the fabric. If needed, carefully peel away the patch. This method is often suitable for delicate materials.
Read more:
This guide has explored the diverse world of no-iron patch application, demonstrating the versatility and effectiveness of these methods for clothing customization and repair. From quick fixes to permanent bonds, we’ve seen how different adhesives and techniques cater to various needs and fabric types. Whether you’re a seasoned DIY enthusiast or a beginner, these no-iron methods empower you to personalize your belongings with confidence, achieving a professional-looking repair without the fuss and potential damage of an iron. Remember, the best method hinges on the desired outcome – a quick, temporary fix, or a long-lasting, durable solution – and the specific properties of both your fabric and patch. Experimenting with different adhesives and approaches, as outlined in this article, is key to successfully patching your garments and accessories.


