How to Stick Patches on Backpacks: Easy Guide for All Types

Personalizing your backpack is a great way to express your style and repair damage. But choosing the right patch application method can be tricky, often leading to frustration when patches fall off or damage the backpack material. Properly applied patches significantly enhance your backpack’s appearance and add a unique touch, while poor application can be frustrating and wasteful. Learn the correct techniques for attaching various patch types to different backpack materials, ensuring a durable and visually appealing result.
1. Types of patches for backpacks
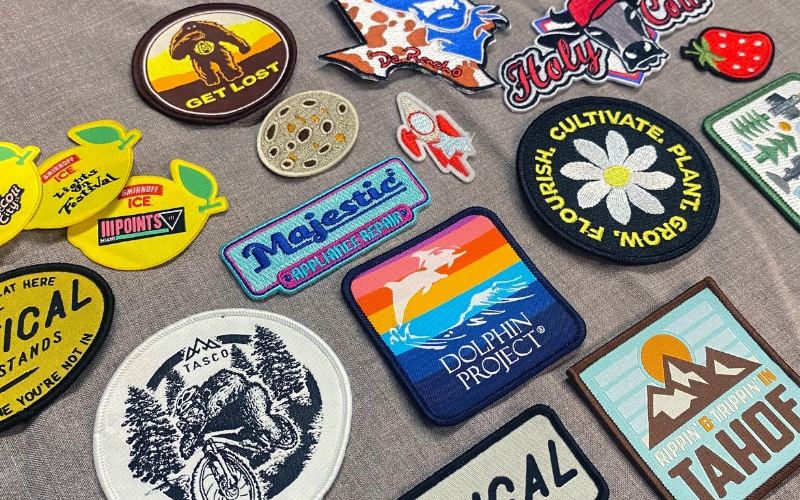
1.1 Embroidered patches
Embroidered patches truly bring a unique visual and tactile element to backpacks. The texture inherent in their construction, combined with the detailed artistry often found in their designs – think intricate motifs or distinctive patterns – elevates the look of any backpack from ordinary to something quite special. This inherent visual appeal is a key reason why embroidered patches are so sought after for customization. They offer a fantastic way to inject personality and individuality.
The real strength of embroidered patches, especially when considering backpack applications, lies in their adaptable attachment methods. For those prioritizing a secure and lasting bond, sewing patches directly onto the backpack fabric is the most reliable approach.
This method is ideal for backpacks that will see heavy use or need to withstand the elements. However, for situations where speed or perhaps a less permanent application is desired, iron-on patches or those with fusible interfacing offer a convenient alternative.
These are particularly useful for lighter-duty backpacks or when you want to switch patches out periodically. Furthermore, some embroidered patches even come with an adhesive backing, providing an incredibly simple, no-sew, glue-on option.
This variety of attachment methods ensures that embroidered patches can meet a wide spectrum of needs and preferences, solidifying their position as a go-to choice for backpack personalization. You’ll find that whether you’re aiming for durability, speed, or simply ease of application, there’s an embroidered patch attachment method to suit.

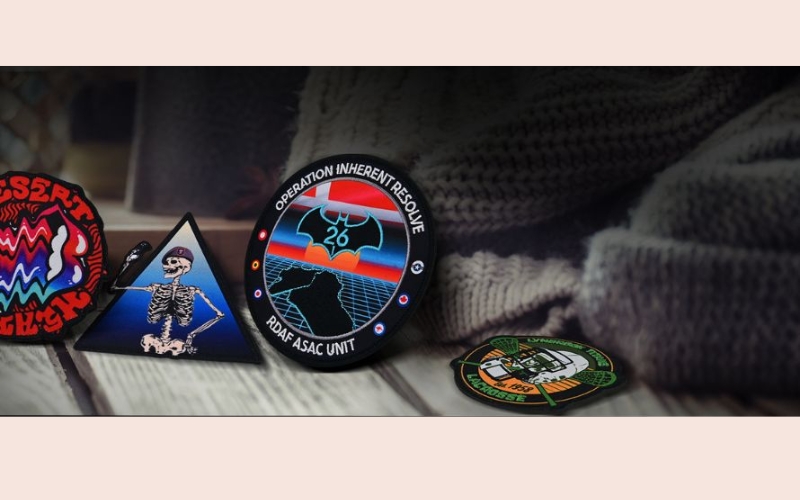
1.2 Woven patches
Woven patches distinguish themselves with a signature tight weave, a key characteristic that underpins their exceptional durability. This dense construction is what makes them so well-suited for designs demanding a high level of detail.
Think intricate logos or complex branding elements – woven patches can render these with remarkable clarity and precision, resulting in a distinctly high-quality and professional appearance. The tightly interwoven fabric not only allows for finer details but also ensures the patch itself is incredibly robust. It holds its shape beautifully and maintains its crisp design even when faced with the daily rigors of wear and tear.
This inherent resilience makes woven patches an outstanding choice for backpacks, particularly when you need a patch that can endure consistent use while consistently projecting a polished and professional image. For businesses or brands looking to showcase their logo or branding on backpacks, woven patches offer a durable and visually refined solution.
1.3 Printed patches
Printed patches present a highly accessible and budget-friendly avenue for bringing a burst of vibrant and diverse designs to your backpack. Printing techniques like vinyl printing and heat transfer printing unlock a vast spectrum of colors, intricate patterns, and even photographic images, giving you incredible creative freedom.
These methods are particularly appealing when you need to produce custom designs quickly and without breaking the bank. For projects where speed and affordability are paramount, printed patches are an excellent solution.
However, it’s important to have realistic expectations regarding their longevity, especially when compared to the robust nature of embroidered or woven patches. While perfectly suitable for many applications, printed patches may exhibit less resilience to the daily wear and tear a backpack typically endures, particularly when it comes to repeated washing or exposure to the elements.
The very materials used in printing can, over time, influence the patch’s resistance to abrasion and fading. Therefore, if you’re considering printed patches, especially for designs with fine lines or intricate details, it’s wise to be mindful of potential wear.
Taking reasonable care can help ensure the printed design remains crisp and vibrant for as long as possible throughout the backpack’s life. For situations where ultimate durability isn’t the primary concern, or for more temporary or promotional applications, printed patches offer a fantastic and cost-effective way to personalize your backpack with eye-catching designs.
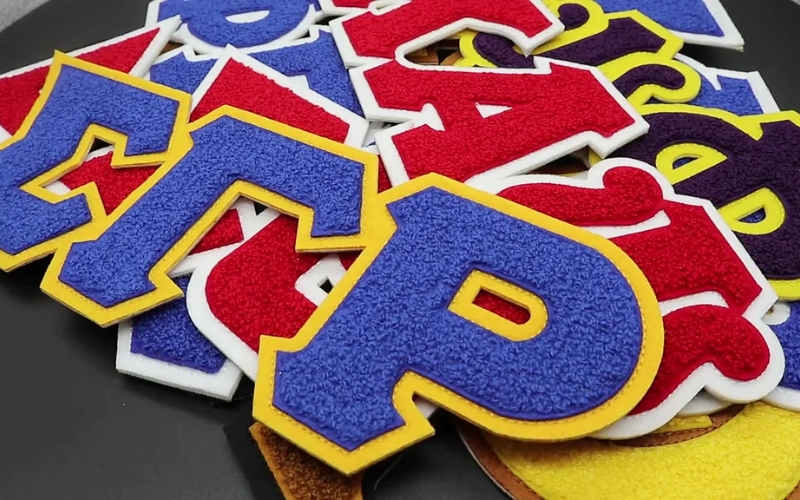
1.4 Chenille patches
Chenille patches are instantly recognizable thanks to their wonderfully distinctive raised and fuzzy texture. This soft, almost plush appearance is the hallmark of chenille, setting them apart from other patch types. The tactile nature of chenille is a significant part of its appeal – it’s a patch you want to touch as much as look at. This unique texture has made chenille a long-standing classic, particularly associated with letterman jackets, varsity sports teams, and various forms of recognition and awards. Think of the iconic varsity letter – almost always rendered in chenille.
The soft, raised fibers create a visually rich, textured effect that truly stands out against the background fabric. This isn’t a flat, subtle patch; chenille makes a statement. Beyond the visual appeal, chenille patches carry a strong sense of nostalgia and spirited camaraderie.
They evoke images of school pride, team unity, and academic or athletic achievements. This is precisely why they are so frequently chosen for school patches, team emblems, and other items linked to sports or academic milestones. The very nature of chenille seems to embody tradition and accomplishment.
Despite their soft feel, chenille patches are also surprisingly durable, offering a lasting form of personalization. For those seeking a patch with a classic, time-honored aesthetic and a tangible sense of history, chenille patches remain an exceptionally desirable option.
2. Methods for attaching patches to backpacks
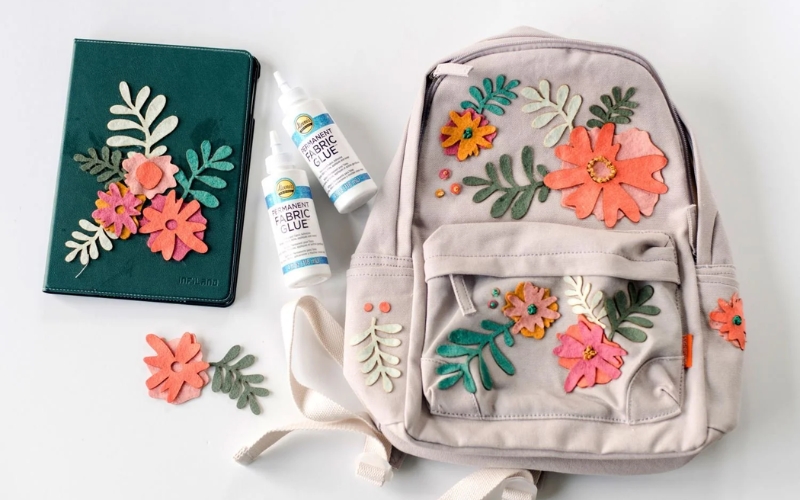
2.1 Using fabric glue
For a truly straightforward and fuss-free patch application, especially on backpacks constructed from materials like nylon, fabric glue presents a remarkably simple solution. This method is particularly appealing as it demands minimal specialized skills and can be readily executed even when you’re on the go. However, it’s worth noting that while fabric glue provides a convenient bond, its long-term durability can be influenced by factors such as frequent exposure to moisture. For backpacks that are regularly subjected to wet conditions, alternative attachment methods might offer greater longevity.
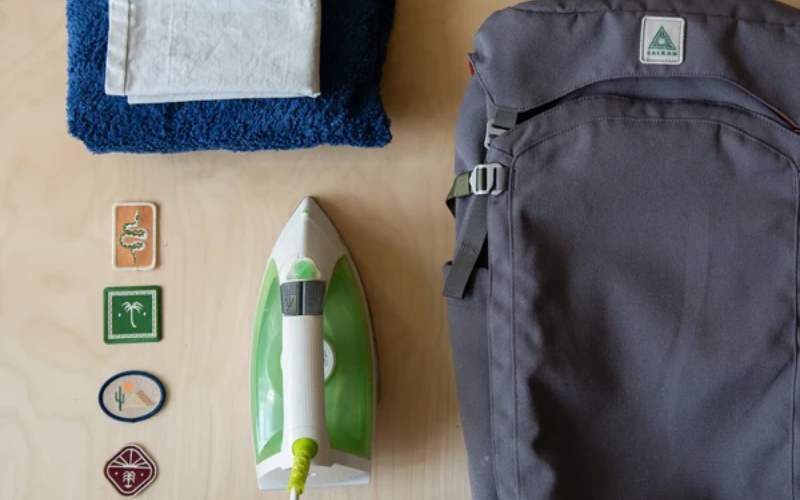
To successfully apply patches using fabric glue, you’ll want to gather a few essential items: a reliable fabric glue formulated for textiles, a pencil for marking, your chosen patches, and a weight – something like a book will work perfectly – to apply pressure.
The first step is to carefully determine the ideal placement for your patch. Experiment with positioning the patches on the backpack until you achieve the desired arrangement. Once you’re happy with the layout, take your pencil and lightly trace around the patch, just a few millimeters beyond its edge. This creates a subtle guideline that will be hidden once the patch is applied.
Next comes the glue application. Carefully and evenly spread the fabric glue within the pencil outline you’ve created on the backpack. Ensure you achieve consistent coverage within the marked area, but take care to stay within the lines to prevent any excess glue from becoming visible or seeping onto unintended areas of the backpack.
With the glue applied, precisely position the patch onto the glued area, aligning it with your pencil guideline. Press down firmly across the entire surface of the patch, paying particular attention to the edges to ensure they make complete contact with the glue.
Finally, to ensure a strong and lasting bond, apply even pressure to the patch. Place your chosen heavy object directly on top of the patch and the surrounding backpack area. This consistent pressure is crucial for proper adhesion.
2.2 Iron-On method
Iron-on patches are a fun and straightforward way to personalize your backpack. Here’s how to do it right:
Step 1: Find a clean, heat-resistant surface. Ensure there’s nothing underneath or near the backpack while you work.
Step 2: Before starting, confirm your backpack fabric is suitable for iron-on patches. Avoid applying iron-on patches to synthetic materials like nylon, as they can melt. Canvas, denim, or cotton are better choices.
Step 3: Turn on the iron and set it to the correct temperature, checking the manufacturer’s instructions for your patch. Ensure the iron is on a stable, heat-safe surface, away from flammable materials.
Step 4: Lay the backpack flat on your work surface, ensuring no wrinkles. If the fabric has wrinkles, iron the specific area where you plan to apply the patch first. This creates a smooth surface for optimal adhesion.
Step 5: Place the patch onto the backpack in its desired location. Lay the pressing cloth over the patch. Iron the patch for 30 seconds, using gentle, circular motions over the entire area. Ensure you thoroughly iron the edges of the patch.
Step 6: Carefully remove the pressing cloth and inspect the patch. Ensure it’s fully adhered. If any gaps or wrinkles remain, repeat step 5 for that area. The area will still be hot, so exercise caution.
Step 7: Iron the backside of the patch for an additional 15 seconds with gentle circular motions to further secure the patch. This step is often recommended for a stronger hold.
2.3 Sewing patches onto backpacks
Sewing is a reliable and durable method for attaching patches to a backpack, often preferable to glue or iron-on methods, especially for long-lasting results. You can even use glue or an iron-on as a preliminary step, making the sewing process easier and the finished look neater.
Below are essential steps for securely hand-sewing patches onto a backpack:
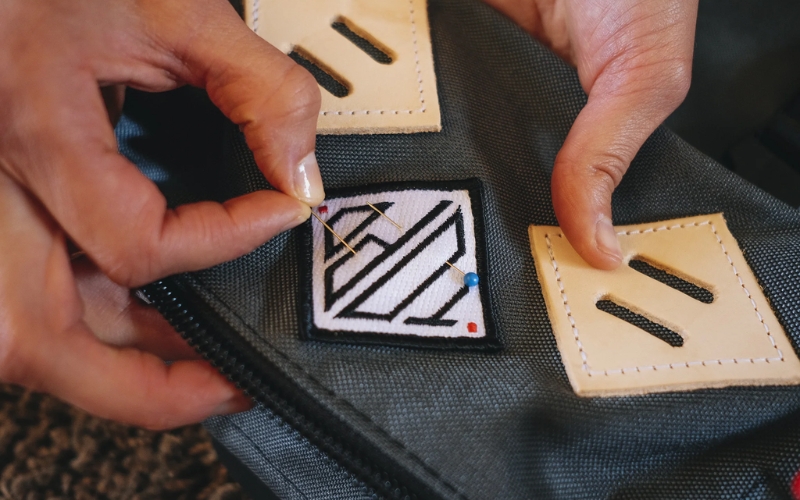
Step 1: Use safety pins to temporarily secure the patch to the backpack’s fabric. This prevents shifting during the sewing process.
Step 2: Select thread that matches the patch’s color to minimize visibility. Thread a needle, then double-knot the thread end securely. A double knot, created by bringing the two ends together, will help ensure the thread doesn’t unravel or come loose during sewing.
Step 3: There are two common options: a running stitch (straight stitch) or an overcast stitch.
Running Stitch (Straight Stitch): Insert the needle from the inside of the backpack, through the patch, and back into the bag a few millimeters away. Repeat this motion, creating a series of small stitches that resemble horizontal lines along the patch. Adjust stitch length according to the edge of the patch.
Overcast Stitch: Start as you would for the running stitch, inserting the needle from inside the bag, into the patch. Bring the needle up to the edge of the patch, then insert it back into the fabric just above the previous stitch. Continue this “overcasting” motion along the patch’s edge, forming a row of vertical stitches.
Step 4: Carefully sew around the entire perimeter of the patch, ensuring each stitch is firmly anchored and secures the patch to the backpack fabric.
2.4 Using bonding patches
Bonding patches are a simple and readily accessible way to personalize items like packback, laptops, and water bottles. They offer a straightforward, often sticker-like application process.
Step 1: Clean the area where you want to apply the patch thoroughly, removing any dust, dirt, or moisture. A clean surface is crucial for a strong bond.
Step 2: Allow the cleaned surface to dry completely before proceeding to the next step.
Step 3: Carefully peel away the backing from the patch. Position the patch precisely on the desired location on the item.
Step 4: Apply even pressure across the entire patch to ensure complete adhesion. Press firmly to activate the adhesive and make a strong bond.
Step 5: For enhanced bonding, especially on flat surfaces, place heavy objects on top of the patch for several hours, increasing the pressure and solidifying the bond.
Step 6: Once the patch is applied, avoid getting it wet or disturbing the area until the adhesive has fully cured. This precaution helps maintain the patch’s longevity.
3. Choosing the right method based on backpack and patch material
3.1 Patches on canvas backpacks
Canvas backpacks, renowned for their inherent durability and ruggedness, truly benefit from patch attachment methods that are equally robust. When it comes to securing patches to canvas, sewing and gluing generally emerge as the most reliable approaches for achieving a lasting and secure bond.
Sewing, in particular, offers an exceptionally strong and essentially permanent attachment. This makes it an ideal choice for areas of the backpack that are likely to experience significant wear and tear, or in situations where maximum durability and longevity are paramount. The stitched connection becomes an integral part of the canvas itself, ensuring the patch stays firmly in place.
Alternatively, for canvas, using a high-quality fabric glue specifically formulated for outdoor use or designed for canvas materials can also yield a remarkably reliable and even water-resistant bond. However, the key here is selecting the right adhesive.
It’s crucial to choose a glue that is specifically known for its ability to withstand the stresses and potential moisture exposure that a canvas backpack is likely to encounter in everyday use. This approach can be particularly well-suited for larger patches or areas where stitching might be less aesthetically desirable.
Therefore, when opting for glue, take extra care in selecting a product that explicitly states its suitability for canvas and outdoor applications, emphasizing its water resistance and durability. Regardless of whether you choose sewing or gluing, proper preparation of the canvas surface before attaching the patch is absolutely vital for ensuring a secure and long-lasting bond.
3.2 Patches on nylon backpacks
Nylon backpacks, while prized for their lightweight nature and water resistance, present a distinct set of considerations when it comes to patch application. The inherently smooth surface of nylon can make achieving strong adhesion with certain methods somewhat challenging. Furthermore, nylon’s sensitivity to high temperatures is a crucial factor to keep in mind, as excessive heat can easily damage the fabric.
While various patch attachment approaches might be attempted, sewing consistently emerges as the most reliable and durable solution for nylon backpacks. The tightly woven structure of nylon fabric, combined with the material’s inherent characteristics, makes stitching the most secure and long-lasting way to ensure patches remain firmly affixed. A sewn patch essentially becomes integrated with the fabric itself, minimizing the risk of detachment.
If, however, you opt for glue as your preferred method for attaching patches to a nylon backpack, meticulous care in adhesive selection is paramount. It is essential to choose a low-temperature, flexible adhesive that is specifically formulated for use on nylon or other synthetic fabrics.
Standard craft glues or high-temperature adhesives are generally unsuitable and could either fail to bond properly or damage the nylon. Crucially, absolutely avoid applying hot irons directly to nylon when using iron-on patches or fusible adhesives. Direct heat from an iron can very quickly cause nylon to melt, warp, or develop an undesirable sheen, permanently damaging your backpack.
When using glue, be particularly attentive to the adhesive’s recommended drying time and understand that even with a specialized nylon-compatible glue, there remains a potential for the patch to shift or gradually loosen over time if the adhesive isn’t perfectly matched to the specific nylon and application conditions.
Therefore, before proceeding with full patch application, it is always prudent to test both your chosen glue and your intended application method on a hidden or inconspicuous section of the backpack first. This test patch will allow you to assess the adhesive’s compatibility with the nylon, ensure it doesn’t cause discoloration or damage, and verify the strength of the bond before committing to attaching your patches.

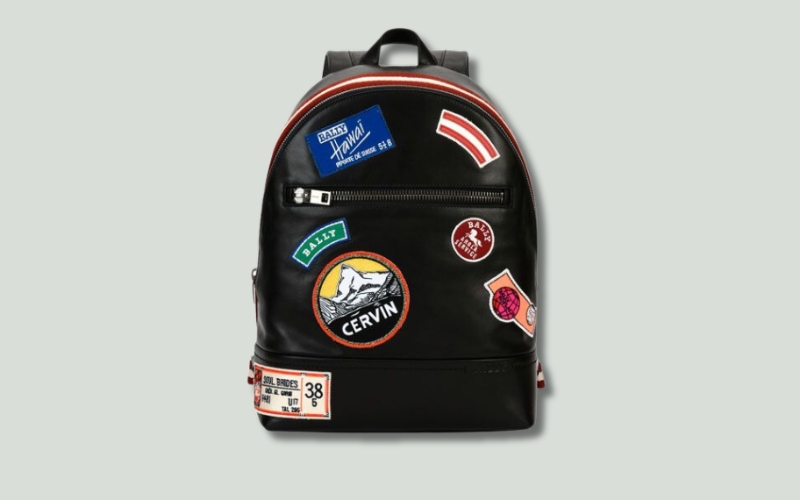
3.3 Patches on leather backpacks
Leather backpacks, with their distinctive texture, luxurious feel, and inherent durability, demand a particularly thoughtful and meticulous approach when it comes to patch application. Attaching patches to leather is not quite as straightforward as with fabric backpacks, and requires careful consideration of the material’s unique characteristics.
While sewing remains a reliable method for achieving a strong and permanent bond on leather, the process itself requires specialized needles and techniques to avoid damaging the material. Alternatively, utilizing adhesives specifically formulated for leather presents another viable option, often preferred for its less invasive nature.
However, the absolute key when considering adhesives for leather is to ensure that any chosen product is explicitly designed and intended for use on leather. Using general-purpose glues or adhesives not formulated for leather can lead to disastrous results, potentially damaging the leather’s delicate surface, altering its texture, or compromising the overall integrity of both the patch and the backpack.
Therefore, before proceeding with any adhesive application, it is absolutely crucial to thoroughly test the chosen adhesive on a hidden, inconspicuous area of the leather backpack. This pre-application test is non-negotiable and allows you to observe how the leather reacts to the adhesive, checking for any discoloration, changes in texture, or weakening of the leather itself.
The inherent porosity of leather, combined with its potential to react unpredictably to various chemical compounds in adhesives, necessitates this cautious approach. It’s a vital step in preventing unintended and irreversible damage.
For leather backpacks that are particularly valuable, antique, or crafted from delicate or exotic leathers, it is highly recommended to seek guidance from a professional leather specialist or conservator. These experts possess in-depth knowledge of leather types, appropriate adhesives, and best practices for attachment, and can provide personalized advice and recommendations specifically tailored to the type and condition of your leather backpack. This added layer of precaution ensures the best possible outcome, preserving the leather’s inherent quality, aesthetic appeal, and longevity.
3.4 Patches on polyester backpacks
Polyester backpacks, much like their nylon counterparts, present a unique set of considerations when it comes to patch application, primarily due to the inherent properties of the polyester fabric itself. Polyester shares nylon’s smooth surface, which can sometimes hinder the effectiveness of certain adhesive methods.
Furthermore, and critically, polyester is also susceptible to damage from high heat, making heat-based patch application techniques risky. Given these factors, sewing consistently stands out as the most dependable and long-lasting method for attaching patches to polyester backpacks.
The inherent structure of polyester fabric, combined with its vulnerability to heat, makes a secure, stitched attachment the optimal choice for ensuring patch longevity and preventing detachment over time. A sewn patch becomes intrinsically linked to the fabric, offering the most robust and durable bond.
It is crucial to avoid applying direct heat to polyester backpacks when attaching patches. Using hot irons, even on low settings, can very easily lead to irreversible damage, causing the polyester fabric to melt, distort its shape, or develop an undesirable sheen. Therefore, iron-on patches or heat-activated adhesives are generally not recommended for polyester.
If, despite the risks, you choose to explore adhesive options for attaching patches to your polyester backpack, meticulous selection of the adhesive is paramount. You must opt for a low-temperature adhesive specifically formulated for use on synthetic materials.
General-purpose glues or adhesives not designed for synthetics are likely to fail or potentially damage the polyester. However, even with a specialized synthetic-compatible adhesive, the potential for incompatibility or unwanted reactions with the polyester fabric remains.
Therefore, before proceeding with full patch application using any adhesive, it is absolutely essential to rigorously test the chosen adhesive on a small, inconspicuous, and hidden area of the polyester backpack. This test patch is not optional; it is a critical step to confirm compatibility, ensure the adhesive does not cause discoloration, weakening, or any other adverse reactions with the polyester fabric.
4. Related questions
4.1 How to remove a patch from a backpack?
Removing a patch from a backpack depends on the method used for its initial attachment. Iron-on patches can often be removed by carefully applying moderate heat using an iron on a low setting, followed by gently pulling the patch away. However, this method requires caution, as applying too much heat or pressure can damage the backpack’s fabric. For glue-on patches, a specialized adhesive remover, applied gently with a soft cloth, can often loosen the bond.
If the adhesive is stubborn, freezing the patch area for a short time might weaken the bond. Directly pulling or scraping can cause significant damage. Removing sewn-on patches requires careful unpicking of the stitches. Use small, precise stitches to ensure minimal damage to the backpack’s material.
Work slowly, making sure that the stitches are completely removed before attempting to detach the patch. Always test any removal method in an inconspicuous area first to assess potential damage to the backpack’s fabric before applying it to a visible area. If you are unsure about any step, err on the side of caution to prevent irreversible damage.
4.2 Where can I buy patches for my backpack?
Patches for your backpack are readily available in various locations. Online marketplaces like Etsy and Amazon offer a vast selection of pre-made patches, from whimsical designs to team logos and personalized creations. Local craft stores such as Michaels and Joann Fabrics often carry a range of iron-on, sew-on, and adhesive patches.
For unique or custom-designed patches, consider online services that allow you to upload your own designs. Alternatively, local embroidery shops can create custom embroidered patches based on your specifications. This allows for a personalized touch and ensures the perfect design for your backpack. These options cater to diverse preferences and budgets, ensuring you can find the perfect patch to express your style and personality.
4.3 Can I wash my backpack with patches on it?
Washing your backpack with patches requires careful consideration of the attachment method. For delicate patches or backpacks, hand-washing is generally recommended. Avoid machine washing if the patch is glued or not securely attached, as the agitation can loosen or damage the adhesive. Always turn the backpack inside out to protect the patches during the washing process.
This will help to prevent any further damage to the patches during the wash cycle. Gentle hand-washing or a delicate machine wash cycle, if recommended, is best for minimizing stress on the patches. If in doubt, spot-cleaning or air-drying the affected area is often the safest option. Thorough rinsing and air drying are crucial to prevent any lingering adhesive residue from damaging the fabric.
Read more:
- How to Put Patches on a Letterman Jacket: A Complete Guide
- How to Make Embroidered Patches: A Step-by-Step DIY Guide
- How to Attach Patches to a Jacket: Iron-On, Sew-On & More
This guide has explored various methods for attaching patches to backpacks, highlighting the importance of matching the technique to the backpack material and patch type for optimal results. Sewing provides a lasting, reliable bond, especially for canvas or leather backpacks and intricate designs. For a quicker application, bonding patches are an excellent solution, offering a simple, sticker-like attachment, though durability may be lower and not as ideal for heavy use.
Understanding the potential heat sensitivity of nylon and polyester necessitates a cautious approach with iron-on patches, and a meticulous application process. Always prioritize a method that aligns with the material’s inherent characteristics, such as the type of fabric and the patch itself. By thoughtfully selecting the correct technique and taking necessary precautions, you can confidently personalize your backpack, showcasing your creativity and achieving a visually appealing and durable result.


